
Logitech Linux Setup
This guide covers Logitech devices connecting via Unifying, Bolt, Nano, or Bluetooth receivers. It replicates Logi Options+ key reassignment and the Actions Ring using Solaar and Kando respectively.
Quick append
Want both presets applied at once? Download the logitech-linux-setup zip and run the installer. It copies the Solaar and Kando presets into the right config directories (auto-detecting Flatpak vs native; use --flatpak or --native to force), backing up any existing files first.
Install Solaar and Kando before running install.sh.
When neither a Flatpak nor a native install is detected, the configs are applied for the native app's path, but the configs would not take effect until the apps are installed!
# You can do the following via your file explorer as well:
#     1. Extract the zip file,
#     2. right-click on install.sh, give it permission if needed
#         Properties -> Toggle on "Executable as Program"
#     3. run it.
cd logitech-linux-setup
chmod +x install.sh
./install.sh
Quit Solaar before running so it loads the new rules on next launch; Kando hot-reloads, so its menus apply immediately. Device-specific Solaar settings (DPI, backlight, haptic) are per-device — set them in the GUI after pairing.
Part 1: Solaar — Key Reassignment
Download the zip for the Solaar button-remap preset (rules.yaml) for the MX Master 4 and MX Keys S.
rules.yaml is the portable part of the Solaar configuration — it defines which button fires which key event and works across machines. Device-specific settings (DPI, backlight, haptic level, smart-shift, scroll ratchet, etc.) are not portable: they are stored per physical device and must be configured in the Solaar GUI after pairing.
The example rules.yaml remaps the MX Keys S F-row smart-action keys and several MX Master 4 mouse buttons — expand below for the full list of what the preset includes.
What the preset remaps — all mappings for MX Keys S and MX Master 4
MX Keys S — F-row smart-action keys
- Dictation →
Super+i— the Dictation key has no native Linux action, so it's repurposed to open GNOME Settings. - Emoji →
Super+Shift+v— firesSuper+Shift+v, intended for the emoji-copy GNOME extension; the binding stays inert until you install an emoji extension/app bound to that shortcut. - Mute Microphone →
XF86_AudioMicMute— emits the proper mic-mute keysym so the key actually toggles the microphone under Linux (the stock key sends no recognised mic-mute event). - Screen Capture →
Print— sendsPrint(PrtSc) to trigger GNOME's screenshot tool, since the stock Logitech "snip" action isn't wired on Linux. - Screen Lock →
Tab— the lock key sits next to the numpad; remapping it toTabgives a numpad-adjacentTabfor faster numeric/spreadsheet data entry (field-to-field) without reaching across the keyboard.
MX Master 4 — mouse buttons
- Back Button → holds
Ctrl— pressing the button depressesControl_L; releasing it liftsControl_L. The physical button acts as a heldCtrlmodifier for the duration of the press. - Forward Button → holds
Shift— pressing depressesShift_L; releasing lifts it. Lets you holdShiftwith your thumb to extend selections or triggerShift-modified shortcuts. - Mouse Gesture Button → holds
Super— pressing depressesSuper_L; releasing lifts it. Holding the gesture button while moving the mouse triggers anySuper-based shortcuts or gestures active in your desktop environment. - Haptic button →
Super+Shift+F1— a single click firesSuper_L+Shift_L+F1, which is the trigger shortcut that opens the Kando menu (matching the Kando menu binding set in Part 2 of this guide).
Installing Solaar
flatpak install flathub io.github.pwr_solaar.solaarThe Flatpak version of Solaar may not detect devices out of the box due to udev permission restrictions. If your device is not detected, follow the udev rules setup from the Solaar documentation, or use Flatseal to grant USB device access.
sudo dnf install solaarsudo pacman -S solaarsudo apt install solaarIf your device is not detected after install, log out and back in, then replug the receiver.
Pairing & managing your device
Pair a new device
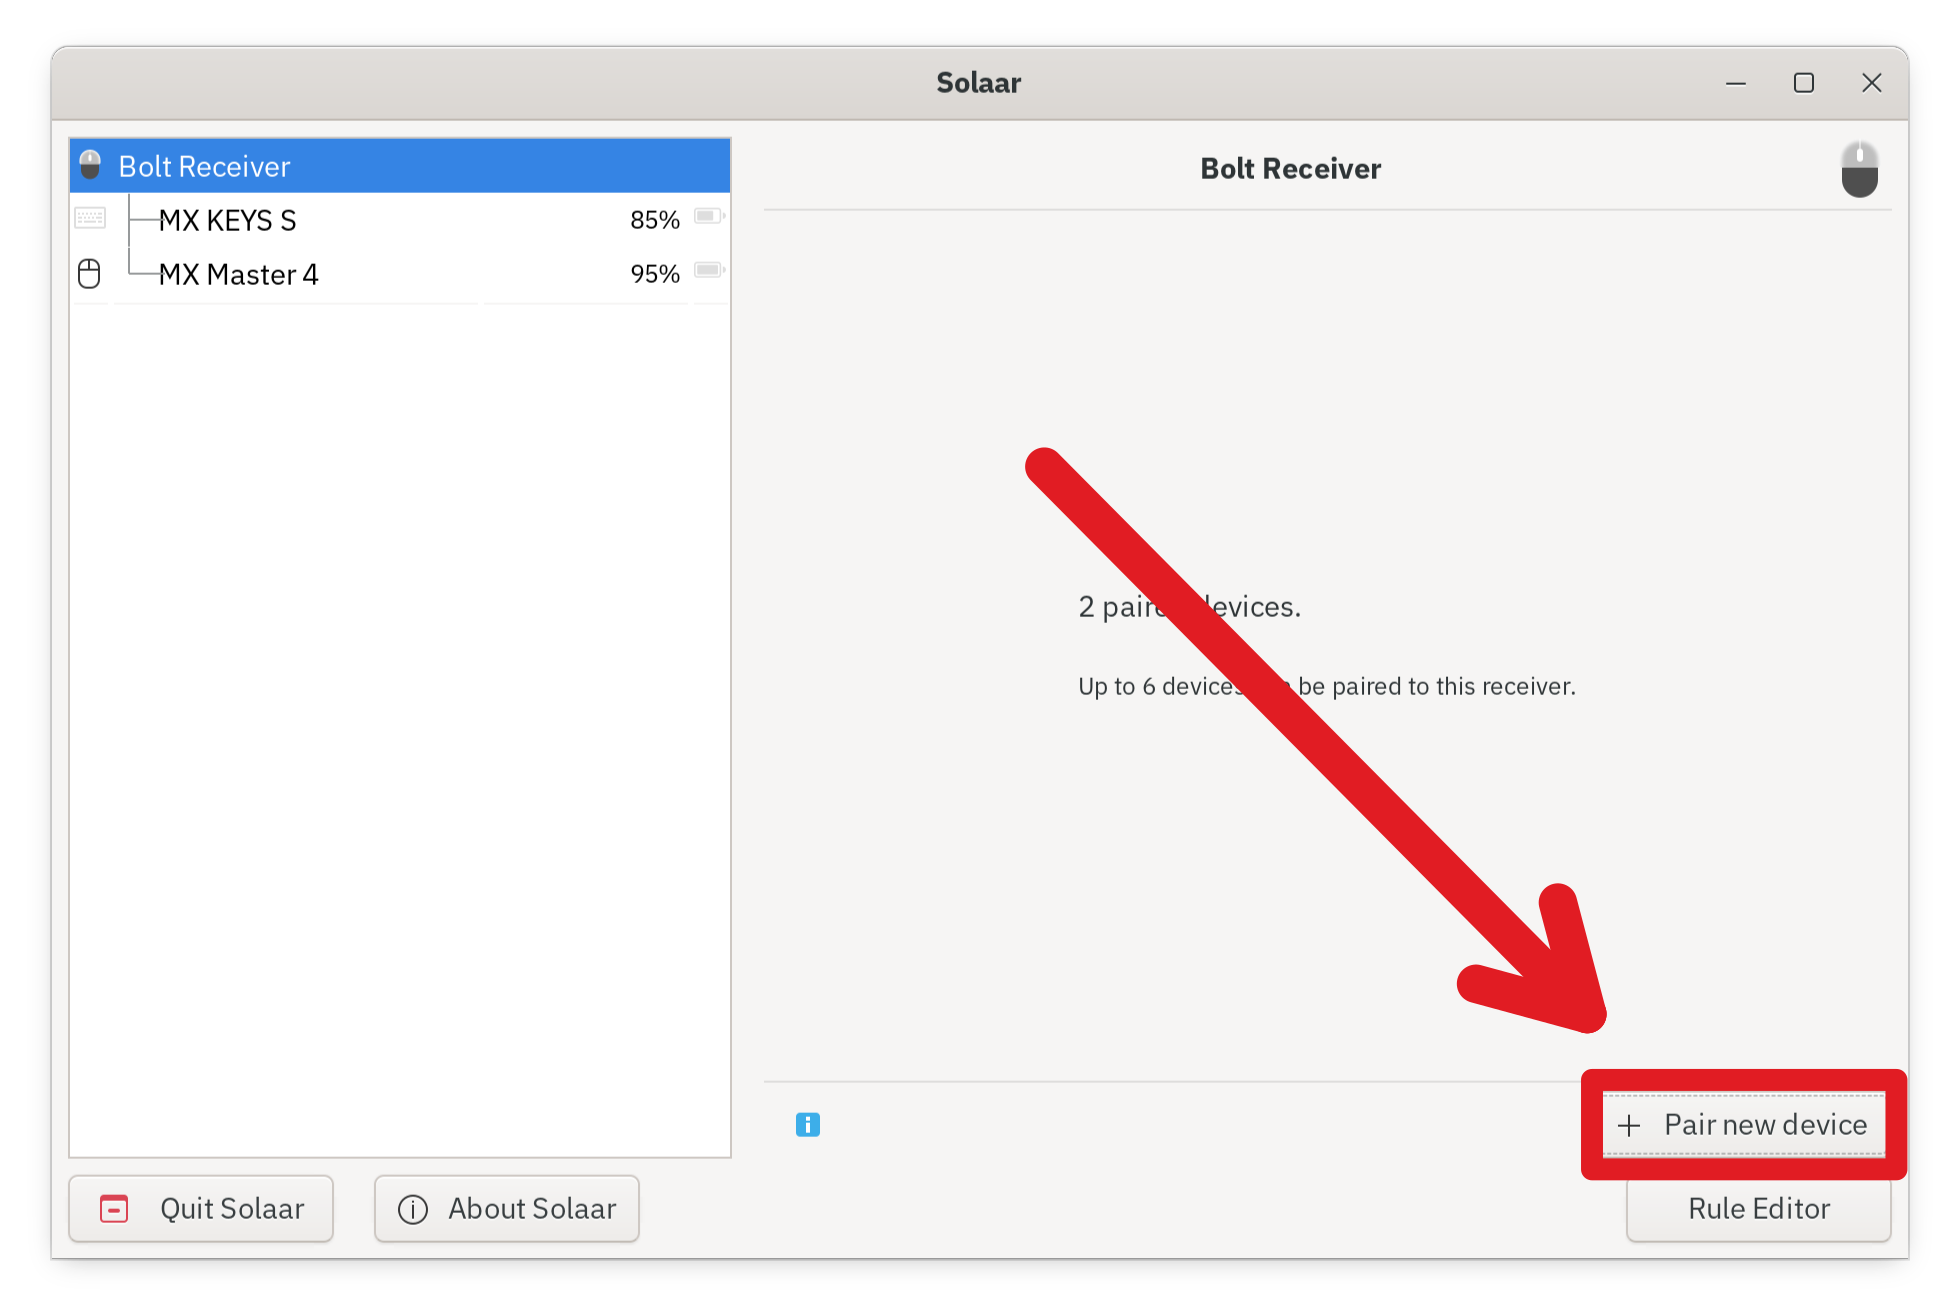
Click your receiver in the left panel and select Pair new device, then follow the on-screen prompt. Bluetooth devices appear automatically if system Bluetooth is active.
Adjust device settings
Select your device in the left panel. The right panel exposes all available settings — DPI, scroll direction, pointer speed, and function-key behaviour — depending on your hardware model. These settings are stored per physical device and are not exported with
rules.yaml; set them once in the GUI after pairing.
Remapping buttons with rules
The Rules Editor is Solaar's equivalent of Logi Options+ key redirection. Rules intercept a button press and fire a custom action — a keystroke, shell command, or modifier combination — with optional conditions based on the active application.
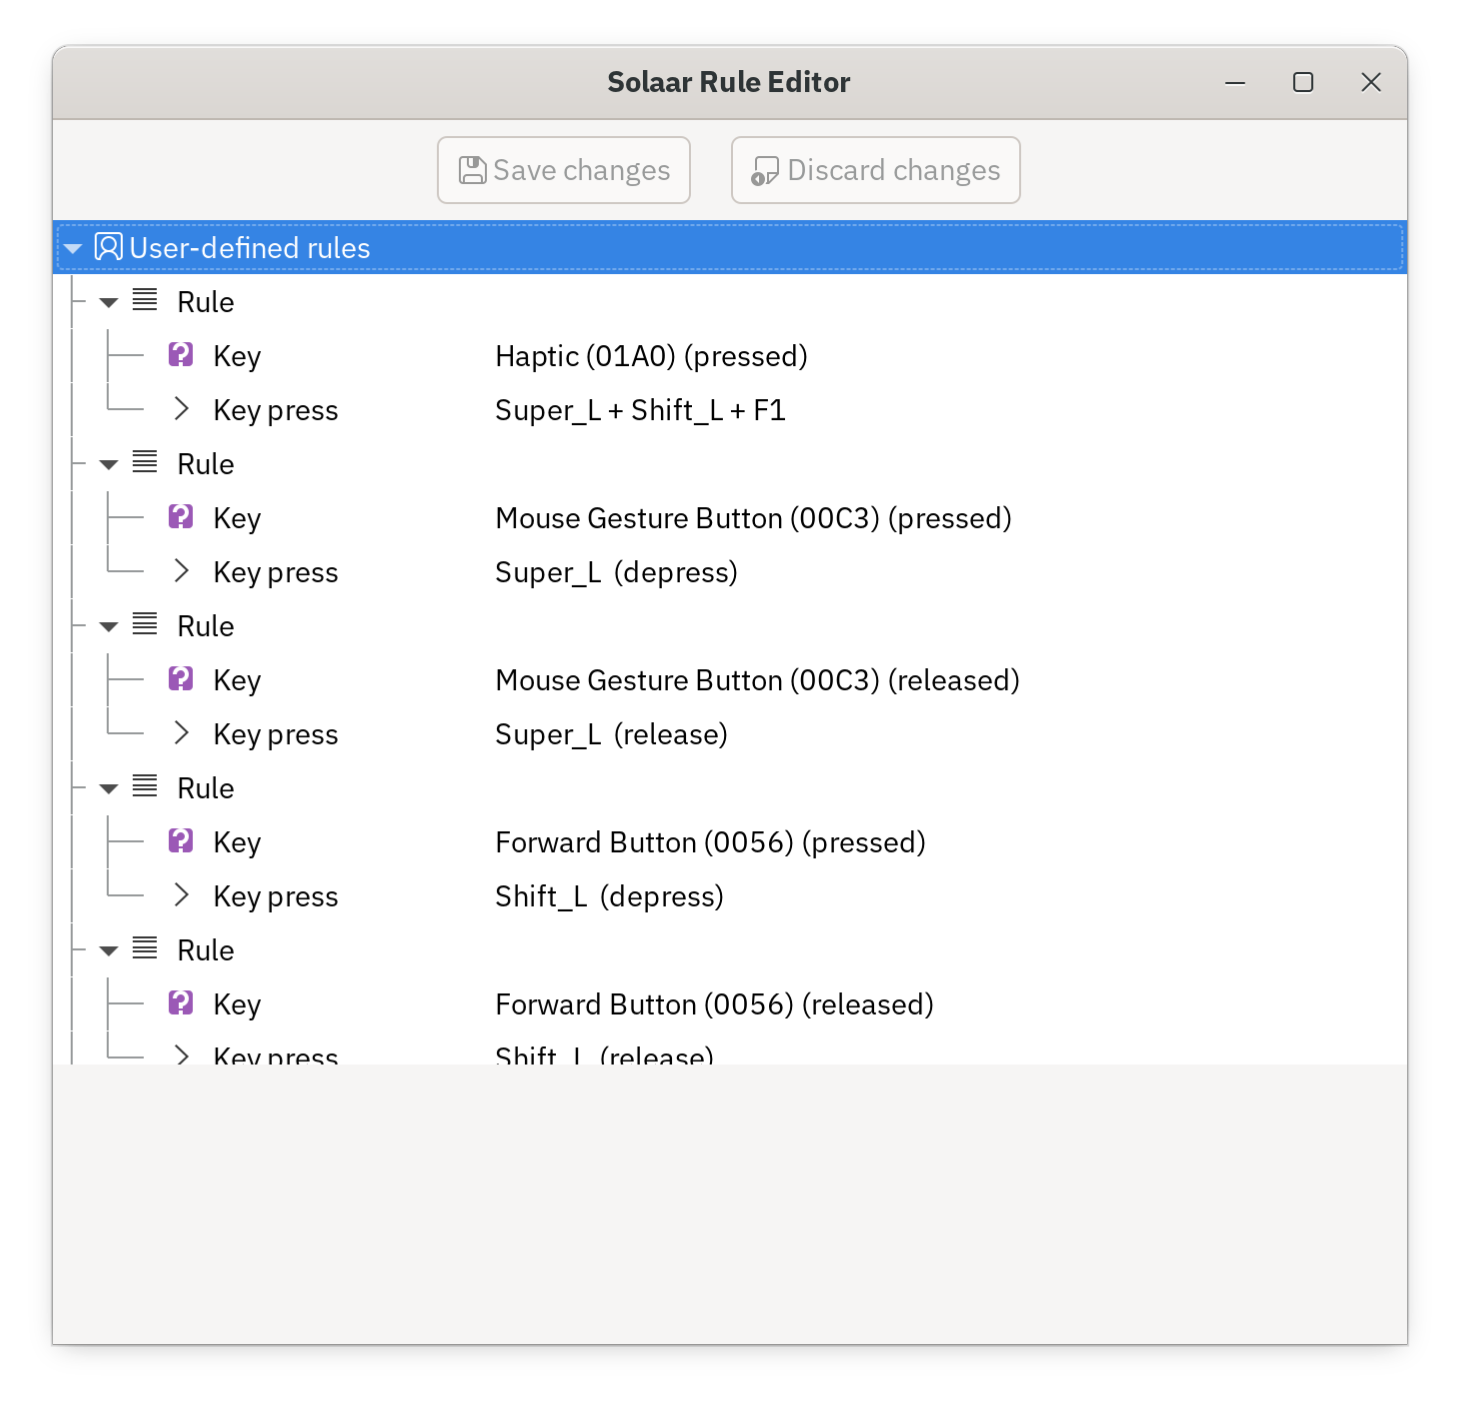
Open the Rules Editor
Create a new rule
Right-click the Rule node and select Add rule. A new empty rule appears in the tree.
Add a condition
Right-click the new rule and select Add condition → Key. Choose the mouse button to intercept — for example,
Hapticfor the haptic button on the MX Masters 4.Add an action
Right-click the same rule and select Add action → Key press. Enter the key combination to send — for example,
Super_L+Shift_L+F1as a dedicated trigger shortcut (which can be used to trigger the Kando Menu to work as Action Ring).Save and test
Click Save. Press the button — the remapped key event fires immediately with no restart needed.
Fixing button remaps on Wayland (uinput permissions)
If device settings such as battery level, DPI, and renaming work in Solaar but remapped buttons fire no keystroke, the session is missing write access to /dev/uinput.
This fix is only needed on Wayland. X11 sessions use XTEST for synthetic input and are unaffected.
Why this happens (technical detail)
On Wayland, Solaar injects synthetic keypresses through /dev/uinput. The shipped solaar-udev rule (/usr/lib/udev/rules.d/42-logitech-unify-permissions.rules) tags uinput with uaccess, but uaccess does not work for uinput because uinput is a static_node created at boot — it is not bound to a login seat, so the per-session ACL is never applied. On X11, Solaar uses XTEST for synthetic input and needs no uinput access at all.
Create a udev override rule
Create the file
/etc/udev/rules.d/60-uinput.ruleswith the following content. The60-prefix ensures this file loads after the shipped42-rule and takes precedence./etc/udev/rules.d/60-uinput.rulesKERNEL=="uinput", GROUP="input", MODE="0660"Add your user to the
inputgroupsudo usermod -aG input $USERReload udev and re-login
sudo udevadm control --reload-rules && sudo udevadm triggerA full log-out and log back in is required for the group change to take effect; reloading udev alone is not enough.
After re-login, press a remapped button in a Wayland session — the assigned keystroke should now fire.
Part 2: Kando
Download the zip for the Kando configuration files used in the section below.
Installing Kando
flatpak install flathub menu.kando.Kandoyay -S kando-binDownload the .deb package from the Kando releases page and install it.
sudo dpkg -i kando-*.debKando runs as a background process and must be started at login to be available. Add it to your desktop environment's autostart (on Gnome, you can do this in Tweaks).
You must download the Kando Integration extension in order to use Kando in Gnome.
Creating your first menu
Add a new menu
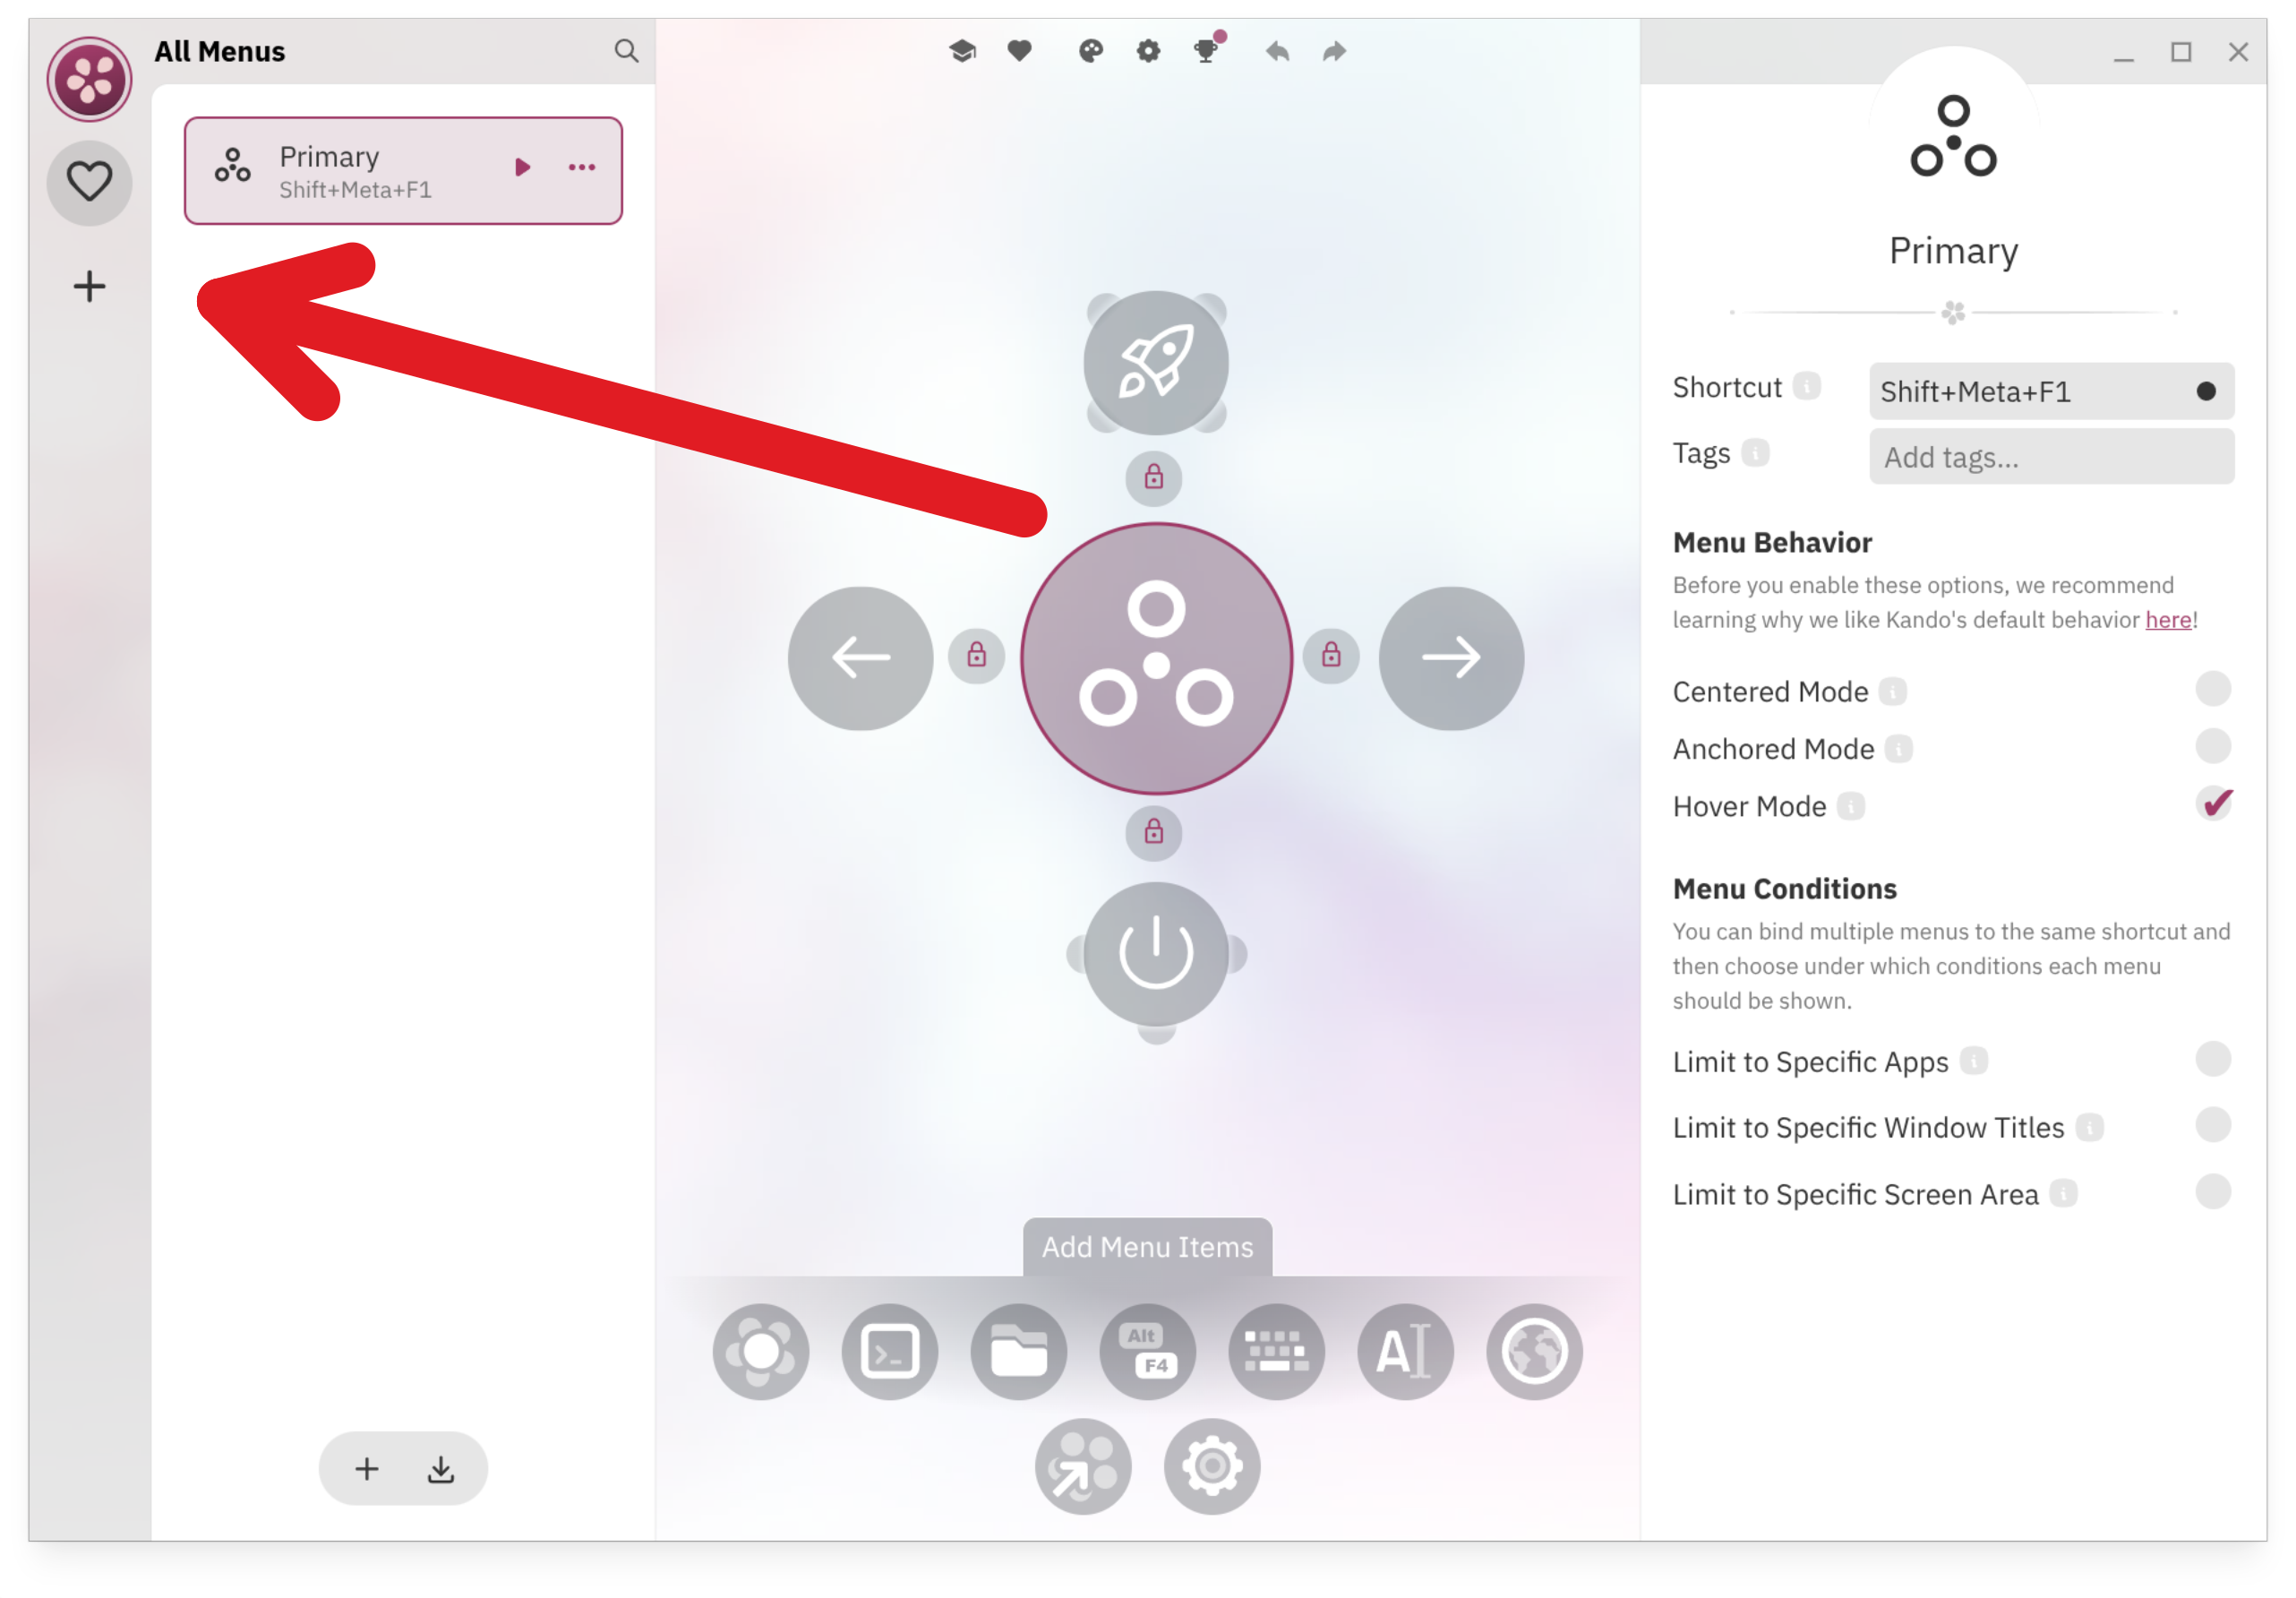
Click Add Menu in the left sidebar. Give it a descriptive name — e.g., 'Productivity' — and confirm.
Add items to the ring
Click the + button in the ring diagram to add actions. Drag items around the ring to arrange them in positions that feel natural for your hand.
Save and trigger
Click Save. Use your assigned trigger shortcut (set in the next section) to open the menu and verify your items appear correctly.
Gesture navigation
Kando supports marking menus — a gesture technique where you draw a direction with your cursor to select an item without stopping to click. Once muscle memory is established for a layout, you can open and trigger an action in a single continuous movement, faster than a keyboard shortcut.
Binding menus to shortcuts
Each menu in Kando has an independent trigger: a global keyboard shortcut, a mouse button combination, or a shortcut scoped to a single application.
Open trigger settings
In the
Kandoeditor, click the menu you want to configure and select the Trigger tab on the right panel.Set a global shortcut
Click the shortcut input field and press your desired key combination. A key combo fired by a
Solaarrule — such asSuper+Shift+F1— works perfectly as a hardware trigger here.
Contributors

Changelog
eb0c5-onf0259-onfdf3b-on51f6a-on53daa-on506b4-onb745e-ond7bf2-onc75f4-on87203-one16f8-on28b48-onb5534-on68e3a-oncc0a2-onefd81-on5c8f8-on637b7-one2434-on8befc-on5810a-on26c5a-on